

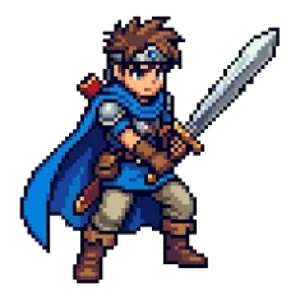

How to Use Pixel Art in YouTube Thumbnails: Eye-Catching Design Tips
A video thumbnail (the cover image) is one of the biggest factors in whether people click. Using pixel art gives your thumbnail a game-like, retro personality and helps your video look different from the rest. This article shares tips for using pixel art in thumbnails.
Thumbnail Size Basics
The standard YouTube thumbnail size is 1280×720px (16:9). Because pixel art is a small image, place it using these steps:
- Prepare a 1280×720px canvas.
- Enlarge your pixel art by a whole-number multiple and place it on the canvas.
How to Upscale Without Blurring
When you enlarge pixel art in an image editor, the edges can turn blurry. Keep these points in mind:
- Set the resampling (interpolation) method to nearest neighbor. Depending on your software, it may be called “Interpolation: None,” “Preserve Pixels,” or something similar.
- Use whole-number scale factors: 2x, 3x, 4x…
- If you rotate or shrink the image after enlarging it, the pixels will get distorted. If you need rotation, rotate first and then enlarge, or choose a layout that doesn’t need any tilt.
For a detailed explanation of why this happens, see How to Choose a Pixel Art Resolution.
Composition Tips
- Make one main subject big: Thumbnails are often viewed on small phone screens. Make your character or item take up at least a third of the frame.
- Keep the background simple: Placing a vivid solid color or a gradient behind a pixel art character makes the character stand out. If you also want to use pixel art for the background, make it darker and blurred (lower contrast) than the main subject.
- Leave some breathing room: YouTube overlays the video length in the bottom-right corner. Avoid putting text or anything important there.
Adding Text
Keep thumbnail text to a short phrase of about 3 to 6 characters (in Japanese; in English, a few short words). Pairing a pixel art thumbnail with pixel-style lettering gives it a unified look.
Otomusu’s Pixel Text & Stamp Tool lets you add pixel-style text and stamps (hearts, stars, anger marks, and more) to an image and save it as a PNG. You can adjust the text color, outline, shadow, size and rotation by dragging directly on the screen. You can also choose sizes such as “For social media (1200×630).”
Tips for making text easy to read:
- Add an outline: This keeps the text from getting lost in the background.
- Create a strong brightness contrast between text and background: dark text on a light background, light text on a dark background.
- Limit the number of colors: Use just one or two colors for the text.
Choosing Your Assets
For a game-style video, you can pick Monsters, Characters, Items and backgrounds from the pixel art assets (Pixel Art). They are PNGs with transparent backgrounds, so you can layer them on top of any background you like. If you want to combine several assets into a single picture, you can use the Illustration Maker.
Final Check
- Is the main subject still clearly recognizable on a small phone screen?
- Is the text readable? (Shrink the image to check.)
- Are the pixels still sharp, not blurred?
- Is any text placed where the video length will overlap in the bottom-right corner?
Summary
- Use a 1280×720px thumbnail, and enlarge pixel art by whole-number multiples.
- One big main subject, with a simple background.
- Keep text short and add an outline so it’s easy to read.
- Check how it looks on a small screen.
For how to write asset credits, see How to Write a Credit Notice.
Terms of use for the assets
- Free
- No registration
- Commercial use OK
- Edits OK
- Credit optional
- No usage report needed
See the terms of use for details.
Related articles
- How to Use Pixel Art on Flyers, Posters and Business Cards: A Resolution Guide
- How to Fix White Edges on Transparent PNGs: Background Matching and a Pre-Placement Checklist
- How to Make Pixel Art Icons and Logos That Stand Out on Social Media, Streams and Channels
- Pixel Art Character Design for Beginners: Proportions, Color Count and Silhouette